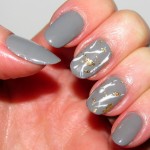
 This Gold Leaf Nail Art Tutorial is created using gold leaf foil and is fairly simple, so it may be possible for it to be recreated at home using traditional nail polish (if you have the patience to wait for the coats to dry), even though I did this using gel. I’ll do the steps below for both types of polish.
You’ll need the following:
* Nail polish remover
* lint-free wipes or cotton pads
* an orangewood cuticle stick or cuticle pusher
* 180-grit buffer or a buffing block (the ones with 4 different sides)
* a nail file
* base coat
* two contrasting nail polish colours of your choice
* gold leaf foil
* top coat
* a mini striping brush (small paintbrush or clean eyeliner brush)
* a pair of tweezers
* cuticle oil and hand cream.
When painting your nails, the correct preparation of your nails is key to getting perfect polish. Begin by removing any old nail polish and then cleanse your nails well with a cotton pad soaked in nail polish remover to remove any natural oils on the nail plate. Don’t soak your nails in water before painting them, as they will absorb water and this will compromise your polish, possibly causing it to crack once they start to dry out. (To read more about this, see “Maintaining your Manicure”)
Shape your nails to the desired shape with a nail file and brush away any excess dust. Gently push back your cuticles using a cuticle pusher or orangewood stick (orangewood sticks are available from Dollar stores or in beauty section of your local department store) and use the sharp or pointy end to gently remove any cuticle residue left over on the nail.
Lightly buff the entire nail surface with a 180 grit buffer (this is usually the rough side on a buffing block). Do not use a nail file as its too rough and it will damage your nail. Brush away any excess dust.
If you’re using gel polish, skip this next step. A smooth, shiny surface is the perfect canvas for traditional polish, so use the other sides of the buffing block to buff your nails to a shine.
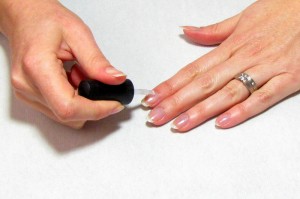
Cleanse your nails again with nail polish remover to remove any natural oils that will have come to the surface of the nail. Apply a thin layer of base coat and cure it according to the instructions on your lamp (for gel) or wait for it to dry.
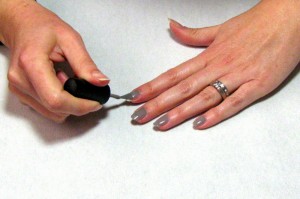
Apply a thin coat of your chosen base colour (I’m using grey) and make sure to cap the free edge (paint along the very tip of your nails). Cure or wait for it to dry.
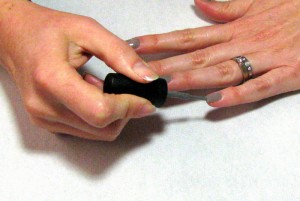
Apply a second, thin coat of your chosen base colour and cure or wait for it to dry.
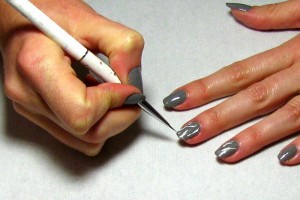
Using a mini striping brush, small paintbrush or clean eyeliner brush, dip the brush into your second chosen nail polish colour and paint thin, random squiggly lines across your feature nails. Cure or wait for it to dry.
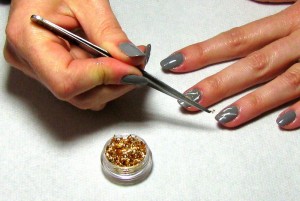
Make sure all the doors and windows are closed and slowly open the pot of gold leaf foil. The slightest hint of a breeze will send this stuff flying everywhere! Take the tweezers and gently pull out small pieces of foil and stick them randomly into the sticky inhibition layer of your gel polish. If you’re using traditional polish, you’ll need to apply a very thin layer of top coat and stick the foil onto that while it’s still tacky but not wet.
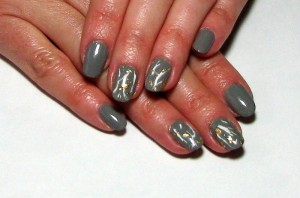
Apply your top coat over the foil (capping the free edges) and cure or wait for it to dry. Finish off your manicure by rubbing cuticle oil onto your nails, cuticles and skin around your nails. Cuticle oil applied daily will nourish your nails and help your polish to last longer by keeping it flexible. Apply hand cream and you’re done!


Leave a Reply
You must be logged in to post a comment.