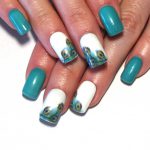
Once you’ve bought your set of Luxury Press-on Nails, you’ll need to size them and apply them.
Step 1: Select the correct size Luxury Press-on Nail that matches the size of your natural nails, ensuring each nail fits your natural nail plate as comfortably as possible. The press-on nail should line up with the sides of your natural nail and not hang over the sides onto your skin. Size each nail on each hand, lining up all 10 Press-on Nails in front of you (in the right order, from left to right) before you begin gluing them on. If you have very petite nails, you may need to trim the width of the press-on nail for the best fit, using the enclosed nail file.
Step 2: Wash your hands and dry them well. Push back your cuticles using the wooden cuticle stick provided, and then lightly buff your entire nail using the small square buffer. Apply some nail polish remover to a cotton pad and wipe your nails well to remove any natural oils, dust or nail polish residue.
Step 3: For short-term wear (1-3 days): Apply a 4-5mm dot or small stripe of glue onto the back of the Press-on Nail (working with one nail at a time) and spread it around a little bit with the tip of the glue tube. For longer-term wear: Apply a generous amount of glue to the back of the press-on nail ensuring that you only place the glue where it will adhere to your natural nail. You can also place a small dot of glue onto your natural nail for extra hold.
Step 4: Wait approximately 6 seconds for the glue to get tacky, and then starting at the base of your natural nail (the cuticle area), apply the Press-on Nail at a 45 degree angle and lower it down onto your natural nail. Press and hold for 15-20 seconds, ensuring that you wipe away any excess glue that may squeeze out of the sides with a tissue or cotton bud. Repeat Step 3 and 4 for the rest of your nails, working with one nail at a time.
To remove your press-ons, follow the instructions in How to remove press-on nails.


Leave a Reply
You must be logged in to post a comment.