Nail extensions, also known as acrylics, hard gels, fake nails, false nails, fashion nails, or nail enhancements, are coverings placed over natural fingernails to provide extra length or strength, or are worn as fashion accessories. Most nail extensions are sculpted to look like the natural nail a much as possible, while fashion nails are often extreme lengths, exotic shapes and even contain impractical embellishments. (Read Nail Shapes for more info on each type of shape.)
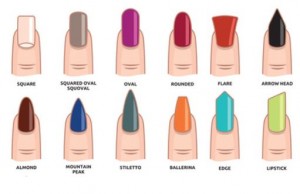
Nail extensions can be applied in various ways, with a variety of materials:
Fake nails are most commonly known as plastic plates, either plain or pre-decorated, that are simply glued onto the natural nail. These won’t last very long and do have a tendency to eventually pop off, often taking off a few layers of the natural nail with it.
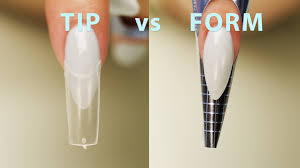
‘Acrylics’ are sculpted using a polymer powder that is mixed with a liquid monomer, and this mixture is then placed over the natural nail, to add length and strength. The proper term for this liquid & powder or L&P, with acrylics being the common term that non-beauty professionals use. These can be applied in two different ways; either over a tip, a lightweight plastic plate that is glued onto the end of the natural nail, the acrylic (or hard gel) is then applied over the entire natural nail and plastic tip.
The second method is to sculpt the entire nail extension in one piece, using a form. Forms are a type of sticker that is placed at the tip of the finger, the natural nail is shortened first and the extension is then built out from the natural nail and over the form, to create one solid structure. Nail extensions created using forms are often stronger than ones built over tips, as tips create a weak spot where the tip is glued on, and if the tip happens to lift or come unstuck, it will cause the nail extension to pop off, possibly damaging your natural nail in the process.
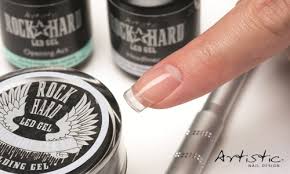
Hard gel and PolyGel is used the same way as liquid & powder (acrylic), with the added benefit of there being no mixing and no smell. The smell that you experience when having liquid & powder nails done is from the liquid monomer. Hard gel comes in a ready-to-use, pre-mixed formula with a honey-like consistency, until it is applied and cured under a UV or LED lamp. PolyGel is a thicker pre-mixed gel that comes in a tube, and is also cured in a UV or LED lamp. Once set, hard gel and PolyGel nail extensions look exactly the same as acrylic extensions, although they do feel slightly different, as hard gel is slightly more flexible than acrylic, so it moves a little bit more with your natural nail’s movements, and PolyGel is a lot lighter than acrylic or hard gel (23% lighter than acrylic and 16% lighter than traditional hard gel, with no sacrifice to durability).
Another difference is removal. L&P (acrylic) has to be soaked off. Never let a nail salon pop or peel your extension off, as this will thin and damage your natural nails. The best way to remove L&P (acrylic) is to soak it for 20 minutes in foil wraps. Hard gel and PolyGel cannot be soaked off, it has to be carefully filed off, making sure to leave a very thin layer over the natural nail, which will eventually grow out. This is to ensure that the natural nail is not damaged in any way.
All three; L&P, hard gel and PolyGel needs to be maintained and backfilled (also called an infill) every two to three weeks. For a side-by-side comparison of the differences between L&P, LED Hard Gel and PolyGel, please read “Gel vs Acrylic Nails“.
Overlays are not really nail extensions, as they don’t add length to your existing nails, but they do add strength, and they are applied directly over the natural nail. Overlays can provide an extra layer of protection for nails that are prone to breakages and splits, and can help nail biters to grow out their natural nails.
Please remember that your nails are not tools. It may be very tempting to use your nice, long, strong nails to open things, pick at things, etc., but you’re bound to damage or break them. Rather use the back of a teaspoon to open cans, and a staple remover or letter opener to remove staples from paper. Learn to type with the pads of your fingers instead of your nails, as this will protect your nails (and extensions) from unnecessary wear and tear.
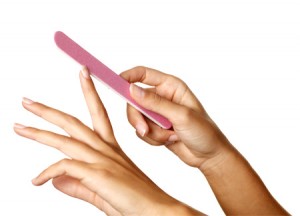
Check your nails often to see if they need to be filed or repaired. Don’t be scared to file down a snag on your nail, especially if you have nail extensions or enhancements. Leaving the snag may mean tearing the extension or enhancement off and possibly damaging the nail underneath. The sooner you repair the damage, the longer your nails will last. Filing a snag or break on your nails will not damage your manicure, if you file your nails correctly.
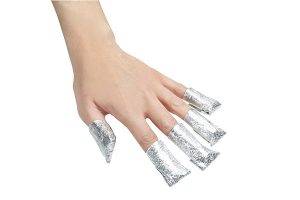
Finally, nail extensions or nail enhancements don’t ruin your natural nails, this is a common myth. What does ruin your nails is the incorrect preparation of the natural nail, and the incorrect removal of these products. If the salon you’re going to is popping your extensions or enhancements off with a tip or other tool, instead of soaking acrylic off in the correct manner (or filing it off, if it’s hard gel or PolyGel), please find another salon that follows the correct removal practices and treats your nails with respect and care that you deserve.
Nail enhancements should never hurt, whether it’s during application or removal, and popping, picking, peeling or ripping them off will cause pain and possibly irreversible damage. If there is any pain, or anything that doesn’t feel right to you during your appointment, please query it with your nail technician.
For more info on how to keep you manicure looking great for as long as possible, please read “Maintaining your manicure”.


Leave a Reply
You must be logged in to post a comment.